


Tutorial: Make a hanging flower chandelier for your next party

If you love the idea of adding a touch of theatre when you’re throwing a party – like a special birthday, engagement, or baby shower – but can’t afford expensive decorators or florist-created arrangements, it’s easier than you think to DIY.
We created this gorgeous hanging flower chandelier from scratch in an afternoon for a statement centrepiece that looks incredible – and smells heavenly.

Materials
Hoola hoop
Green paint for the hoola hoop (if you can’t get a green one)
Wire hoop with 30cm diameter – we found ours at Spotlight
Fishing line
Green washi tape or florist tape
Green florist wire
Scissors
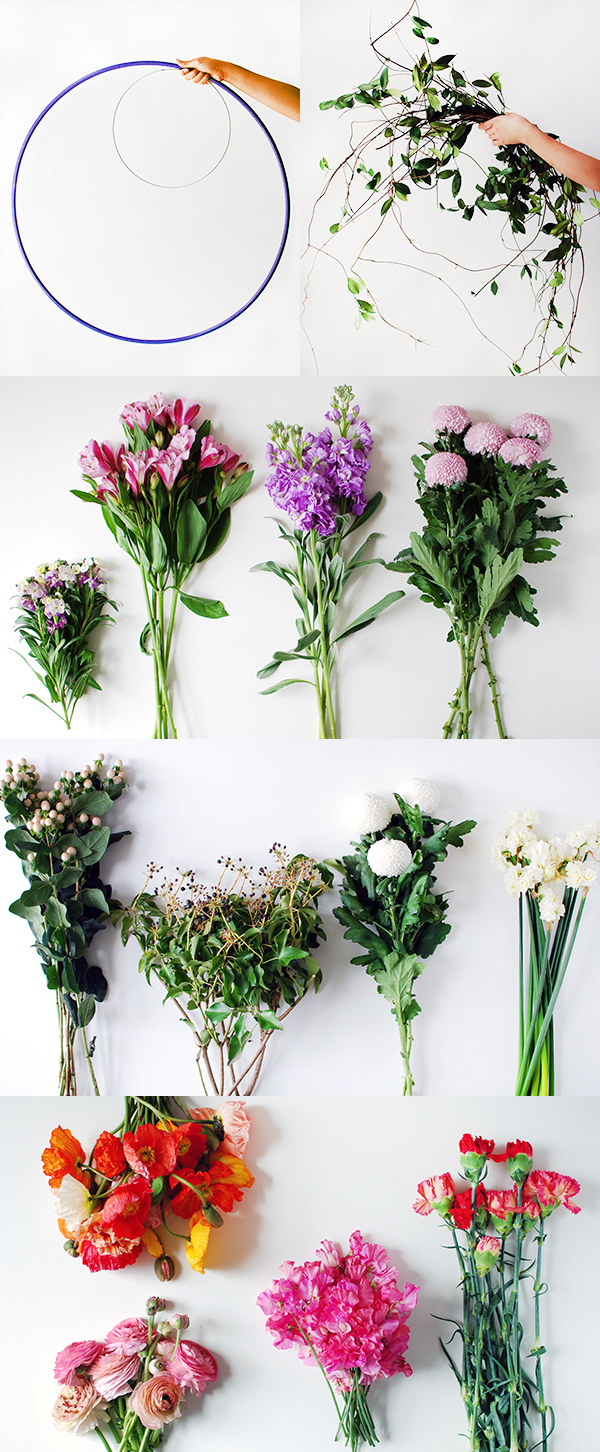
Lengths of fresh jasmine vine
Lots of fresh flowers – pick anything in season. We used an assortment of spring blooms including poppies, ranunculus, carnations, sweet peas, chrysanthemums, pink snowberries and wall flowers.
Let’s get started
Assemble the structure
1. If you need to paint the hoola hoop, you should do this first. We left it until we’d joined the two hoops together, and it was a bit tricky.
2. Attach the two hoops together with four pieces of fishing line evenly spaced around the diameter. The hoops should be about 40cm apart.
3. Secure the fishing line to the hoops with tape.
Add the vines and flowers
1. Start by attaching the lengths of jasmine vine to the wire ring, before moving to the hoola hoop. Wind each piece over and under the ring as you go around, letting the tendrils hang down. Allow the two ends of the vine pieces to hang down as well, and just secure small sections of the vine to the wire with floristry or green washi tape. Tape pieces sparingly and try to work with the curves of the vine for a natural look.
2. Don’t add any flowers to the top wire ring, so build up the pieces of vine to make it slightly more dense. Make sure there are lots of hanging pieces that just about reach the bottom hoop, so that there isn’t a big empty space between the top and bottom parts of the chandelier.
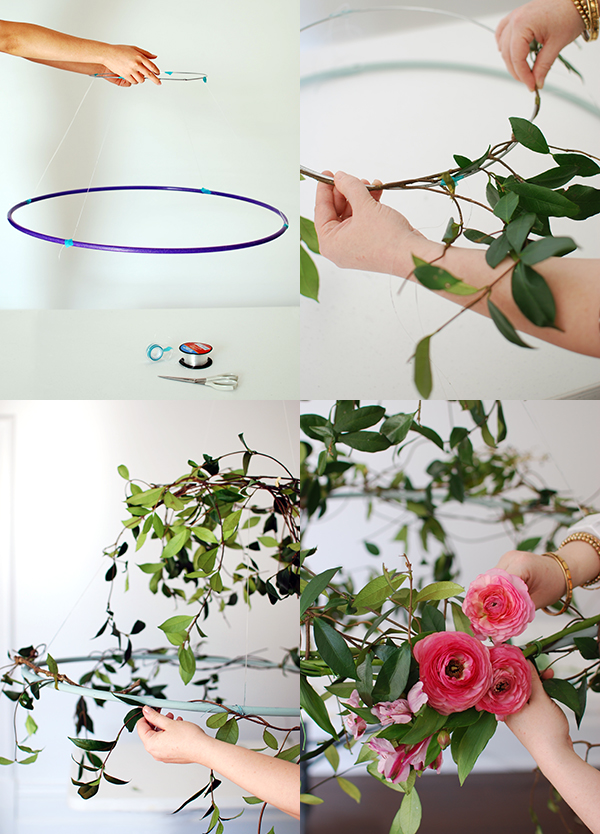
3. Add the flowers to the bottom hoola hoop one at a time, securing them by poking the stems between the vines and the hoop. Use small pieces of tape and florist wire where needed.
Start by grouping three or so of the same flowers together, then add small clusters of flowers either side of the first group.
4. Leave a gap of about 30cm and cluster another group of flowers. Repeat until you have made groupings with the same space between them all the way around the hoop.

5. Now you can begin to fill in the gaps with small flower groups and individual blooms. Add hanging pieces of vine as needed. The aim is to make a natural-looking hanging garden that tumbles down from the chandelier.
As you’re adding the flowers, keep stepping back so that you can get a good overview of how the chandelier is coming together and where the empty spots are.
6. Consider the balance of colour as well as the size and shape of the flowers when you’re placing them.

That’s it – your beautiful hanging floral chandelier is complete!
Give it a light misting with water, and another misting just before guests arrive. Keep it out of direct sunlight so your flowers don’t wilt before the party starts.
Hang the chandelier over the party table for a stunning centrepiece. You can use a temporary or permanent hook in the ceiling, and suspend with fishing line, or hang from any exposed beams.


If you love our hanging flower chandelier, you might like our spring tabletop with hanging flower balls, too.
Check out more creative entertaining and party ideas and gorgeous tabletops here.
Tutorial by Lisa Tilse and Rebecca Lowrey Boyd. All photography and styling by Lisa Tilse for We Are Scout.
This post was originally published on We Are Scout.

